
8 aromatic herbs to plant in January and February
In mid-winter, many gardeners begin to get “itchy.” It usually starts when we open our mailbox and find that first seed catalog. Right there on the cover are plump, beautiful vegetables, reminding us that the hottest days are quickly approaching. So we start dreaming about this year’s garden, and many of us grab a pad of paper to start planning. And in mid to late winter, there are usually seed trays and grow lights encroaching on part of your living space. But don’t forget to reserve some spots under the grow lights for herbs.
Many seeds will not germinate if it is too cold, again, which is one reason why it is best to start germinating seeds indoors. You can achieve even higher germination rates by using a seed starting heating mat. These mats are placed directly under the seed trays and provide gentle, constant heat to the soil.
Also think about light, seedlings, especially herbs, need bright light to become strong without becoming too elongated. A bright south or west facing window should be sufficient when germinating your seeds. However, once your seeds have germinated, you will want to supplement with grow lights.
After all your hard work growing your herb plants, remember to take the time to harden them off before transplanting them outside. Hardening off seedlings involves taking them outside for a few hours as the weather becomes milder. Start with a short period, say half an hour, and slowly add more time. Remember to protect vulnerable seedlings from wind, direct sun or rain while hardening them off. Only one week of consistent hardening off is needed to prepare seedlings for large spaces.
Here we are, we find below 8 aromatic herbs to plant in January and February:
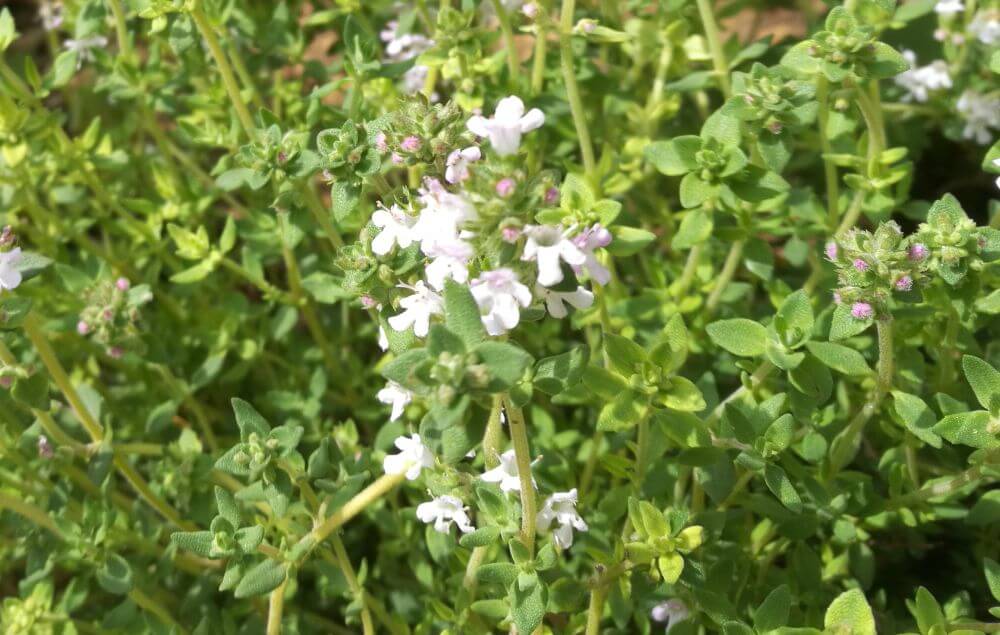
1) Thyme
This culinary favorite adds a wonderfully distinct flavor to so many dishes that it deserves a place in any herb garden. Because thyme grows relatively slowly, starting it early indoors will ensure that you have a decent-sized plant ready at the beginning of your spring growing season. And like many grasses, the seeds are quite small, so starting them in a controlled environment (not windy or rainy) means better germination rates. Thyme seeds require a constant temperature of approximately 15 to 21°C to germinate. Its germination time varies greatly, from one week to twelve weeks depending on the variety, making thyme an ideal candidate for an early start. Remember to be patient.
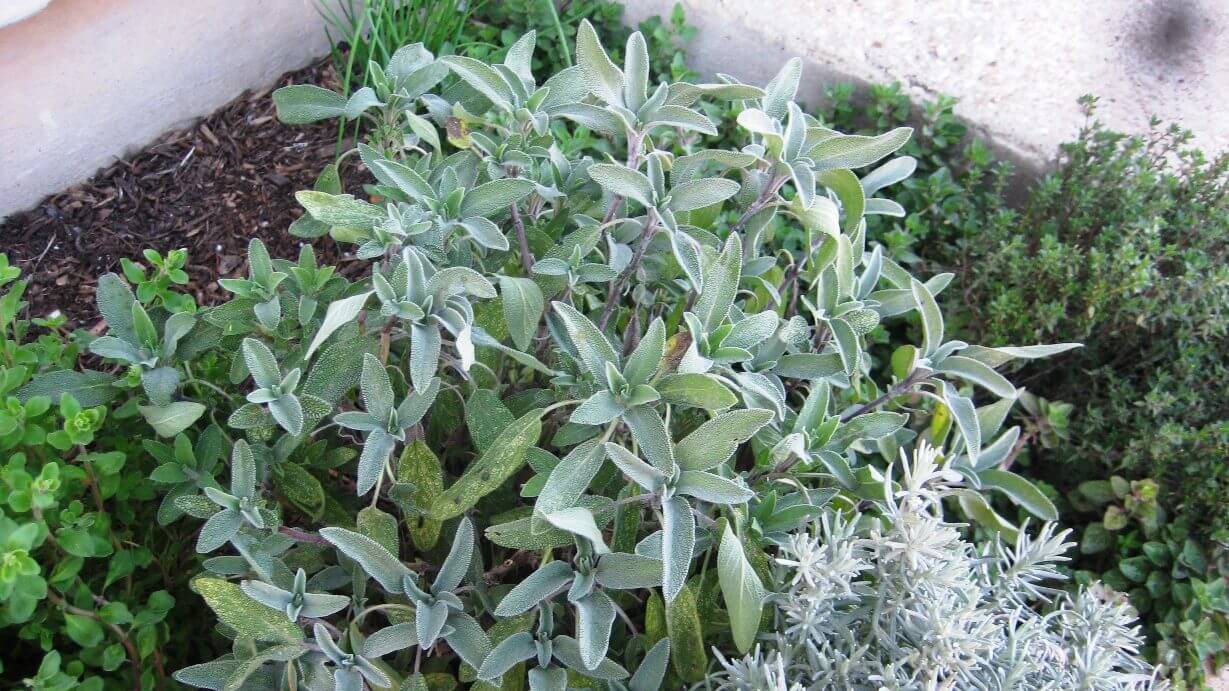
2) Salvia
Because sage takes a long time to germinate, it is a candidate for a head start. But your patience will pay off when you see these little green shoots emerge from the potting soil. Sage needs light to germinate, so your best option is to plant it in the ground and not cover it. You can also soak the seeds in water for about twelve hours before sowing. Soaking improves germination times and can often give you better germination rates as well. Consider covering your seed trays with plastic wrap while you wait for the seeds to germinate, as this is the best way to provide adequate, consistent moisture. Once your sage has germinated, you can remove the plastic film and mist the seedlings as they grow.
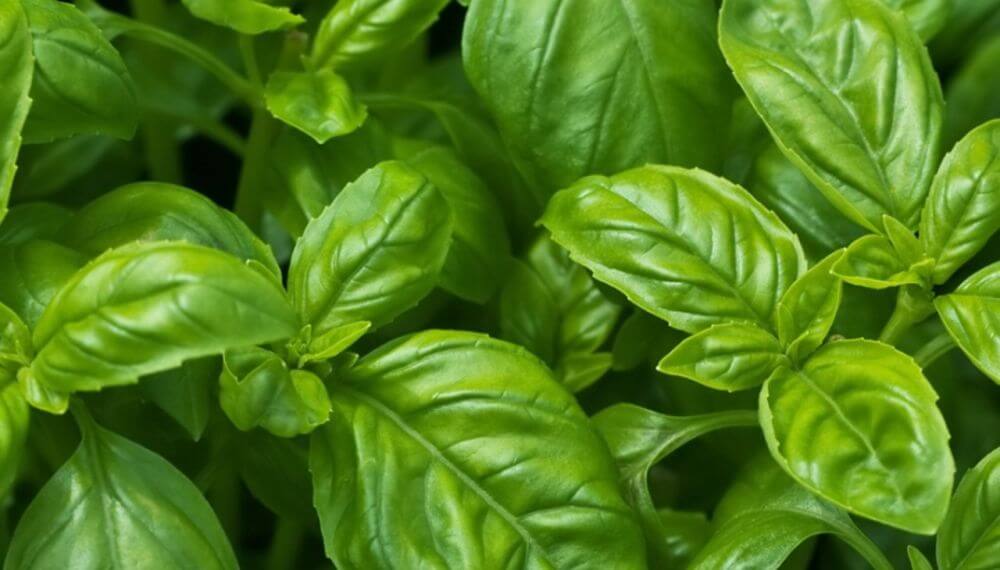
3) Basil
My main reason for growing basil from seeds is that you can never get too much. Forget about spending money on 3 or 4 seedlings at the nursery when you can grow them yourself. Basil germinates quickly, but you must provide warm, moist soil, at about 21°C. You will see germs in about a week. Don’t panic if it takes a little longer. Once your basil has sprouted, your best bet is to provide it with plenty of bright light. Grow lights really help with basil. Basil can take a long time to grow if not grown properly. And once it has grown, it is important to know how to prune basil so that it is beautiful.
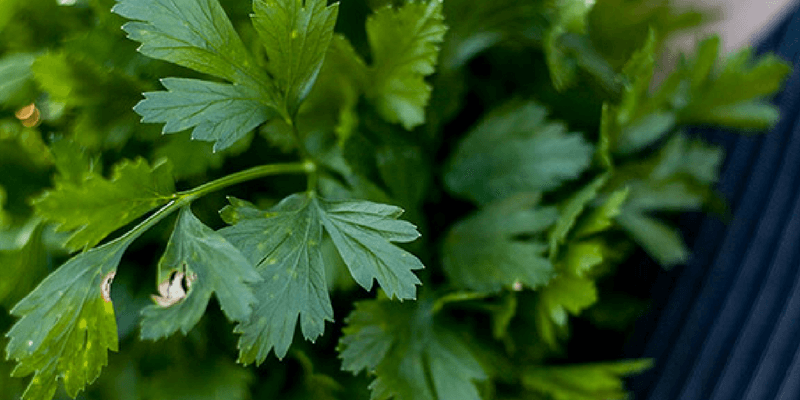
4) Parsley
Like many of the herbs on this list, parsley is a great herb to start early because it can take up to three weeks to germinate. You can give the seeds a boost by soaking them in water for 8 to 12 hours before sowing. Give your parsley seeds a nice, moist environment, and they should germinate well. While most people won’t think to do it, letting some of your parsley go to seed is a great way to save seeds for next year’s parsley.

5) Oregano
Oregano is another popular culinary herb that enjoys an early head start. The seeds need light to germinate, so just place them in your moist seed starter mix. Spray them well, then cover the container with plastic wrap. Keep your oregano seeds warm, around 18 to 24°C, and within a few weeks you should see them appear through the potting soil. Once your oregano has sprouted, you can remove the plastic film.

6) Ask
If you want to grow peppermint, peppermint, or any other type of real mint, you can start indoors to jump into the season. Mint needs light to germinate, so do not cover the seed. However, you can cover the container with plastic wrap to retain moisture. Be patient because it may take a few weeks for mint to germinate. And like most of them, you will have to give it temperatures of about 18 to 21ºC.
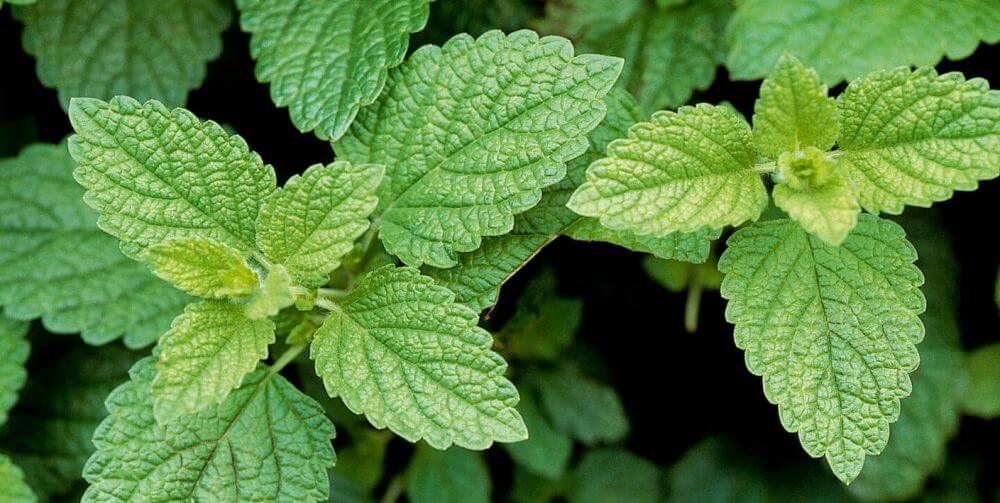
7) Lemon balm
Lemon balm is another seed that takes time to germinate, about 2 to 3 weeks, and as I mentioned at the beginning, starting them early leaves room for other seedlings. You will want to keep the temperature between 18 and 24°C to ensure germination and you do not need to cover the seed because lemon balm needs light to germinate. Of course, if you start using lemon balm indoors, you may never have to do it again because it is a great aromatic herb that self-seeds once you’ve planted it outdoors.
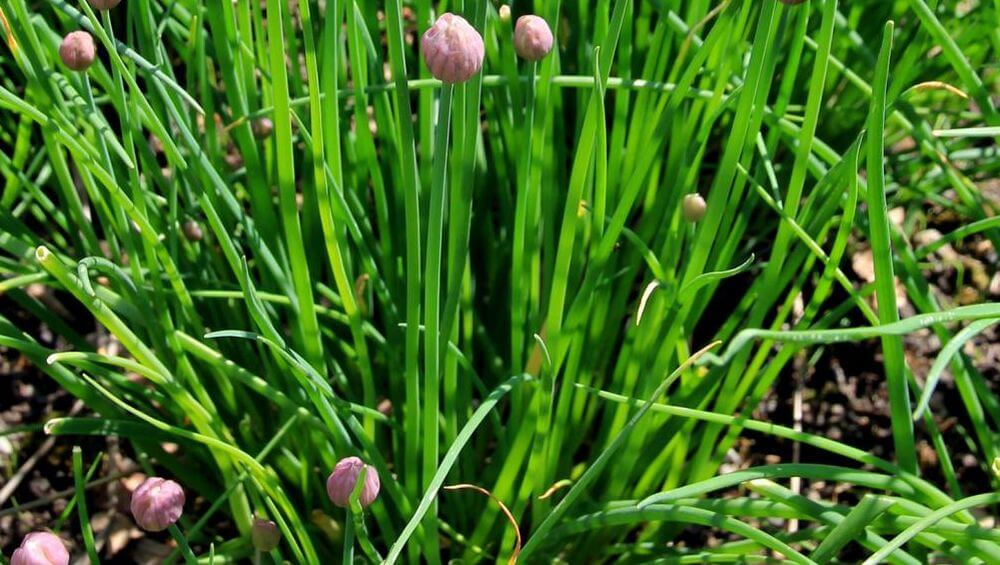
8) Chives
This spicy aromatic herb is so easy to grow from seeds and seedlings that you can’t miss it! Chives should be kept in the dark to germinate, cover the seeds with a piece of newspaper or kraft paper to block the light. They like temperatures around 21°C and can take up to two weeks to germinate. Once your little chives have sprouted, remove the newspaper and give them lots of bright light. They are quite robust despite their fragile appearance and transplanting them is child’s play. Simply remove all the mass from each seed cup or cell and transplant the entire root ball into your garden. The best part is that if you end up with more chive plants than you know what to do with, you can cut them up and use them right away.