Growing Carrots From Discarded Stems
Growing your own vegetables can be a rewarding endeavor, but did you know you can re-grow some vegetables from scraps you might otherwise throw away? One of these vegetables is the carrot. Instead of discarding those carrot tops, why not use them to grow a new carrot plant? In this article, we’ll delve deep into the process of growing carrots from discarded stems.
Understanding the Carrot Plant
Before we dive into the process, it’s essential to understand the carrot plant. Carrots (Daucus carota) are root vegetables, meaning the part we commonly eat is the plant’s root. The green tops or stems, which we often discard, are the above-ground part of the carrot plant.
However, it’s important to note that regrowing carrots from their tops will not yield a new carrot root. Instead, it will give you a beautiful fern-like plant that produces flowers and seeds, which can then be used to grow new carrot plants.
Steps to Grow Carrots From Discarded Stems:
Step 1 – Preparing Your Carrots for Regrowth
Start with mature carrots that are fit for eating. Ideally, these carrots should still possess their leafy tops, as this can enhance sprouting speed.
For this guide, we’re leveraging store-purchased carrots. I’ve cut the tops off these carrots, leaving a bit more of the carrot body attached than I typically would. This added “flesh” can assist in the regrowth process. Meanwhile, the main body of the carrot can be incorporated into your favorite dishes, as I’ve done here.
Once you’ve separated the tops, trim back the leaves, ensuring you retain short stalks connected to the carrot pieces. With these prepared tops, we’re all set to proceed. Next, let’s focus on selecting the right container for the initial growth phase.
Step 2 – Choose the Right Container for Carrot Sprouting
Select a modest-sized container suitable for the initial sprouting phase. It should allow the carrot pieces to rest flatly, with only their bases touching the water. The container’s depth should permit just enough water to achieve this. For my endeavor, I utilized a reused fruit tray from a grocery store, measuring 20 cm in length, 12 cm in width, and 2 cm in depth. The size of your chosen container should be influenced by the number of carrot tops you plan to regrow. In my instance, I prepared 8 carrot tops. Remember, never submerge the scraps fully in water as this can cause them to decay.
Step 3 – Position the Carrot Tops for Optimal Sprouting
Once your container is set, lay the carrot pieces face-down in it. Carefully add plain tap water (without any added nutrients) to the container, ensuring the tops aren’t fully covered. Then, find a shaded spot to place the container, safeguarding it from curious birds or rodents. I discovered the importance of this precaution firsthand after some unexpected visitors showed interest in my carrot tops.
Step 4 – Observe the Magic of Carrot Tops Sprouting
Within a short span of days, I was treated to the delightful sight of the carrot scraps beginning their sprouting journey. The emergence of new leaves was swift and continuous from that point onward. My primary responsibility was ensuring a consistent water level in the container to foster this growth.
I patiently allowed the carrot tops to remain immersed for several more days, eagerly awaiting visible signs of root development. And surely, as demonstrated, these scraps soon sported minuscule roots — a definitive indication that it was time to transition them. Now, the next phase beckons: securing a larger, more appropriate container filled with a suitable long-term growth medium.
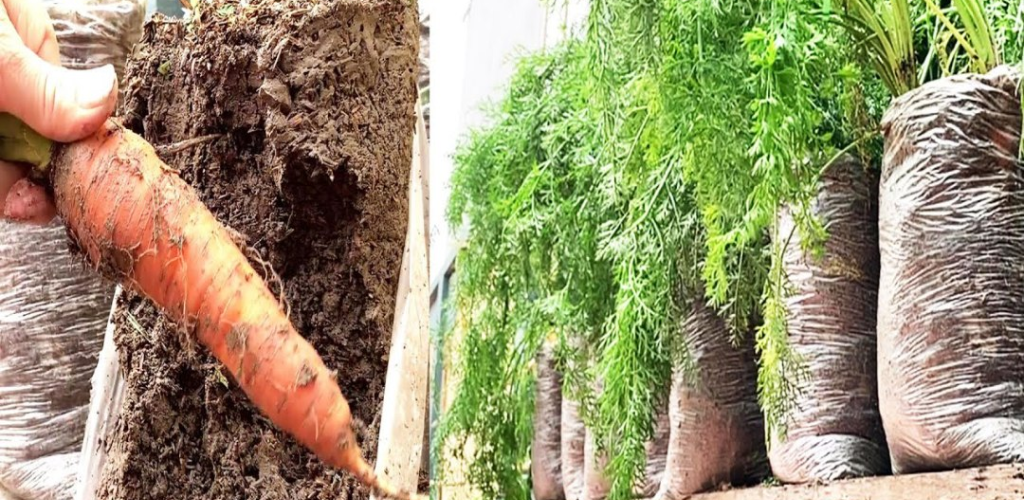
Step 5 – Transitioning to a Larger Container with Suitable Soil for Your Carrot Tops
Your next move largely depends on personal preference. Given that I predominantly cultivate food in containers, it seemed a natural progression to shift my sprouting carrot tops from their aquatic habitat to a more expansive container with soil as its growth medium. However, if containers aren’t your style, feel free to transplant your sprouting tops directly into a traditional garden plot. Both methods work wonders.
I found an unused 20L water bottle in my yard and decided to repurpose it. Cutting it in half, I utilized the bottom portion for my carrot tops. If you’re curious about the fate of the top half, it found a purpose too! I employed it to nurture beet sprouts, another fun project worth exploring. As for the carrot tops, I prepared their new home by filling the base of the bottle with a blend of nutrient-rich soil and compost. I’m somewhat meticulous in my gardening approach, so I arranged the carrot tops on the soil surface first to ensure ample space for each sprout. However, you might choose a more spontaneous planting style, and that’s perfectly fine.
With the layout set, I embarked on the planting. I started by carving out shallow recesses in th