The genius trick to grow an olive tree from an olive stone: nothing could be simpler
Growing an olive tree is a project, an adventure. The tree grows and we grow with it. We learn from its patience, maintain it and water it… and if it wants, it gives it back to us. This article will please those who will be delighted to grow an olive tree in their garden. What a grace it is to adorn your garden with this tree that reminds us of generosity!
These are simple but precise instructions, if they are followed rigorously, you guarantee the growth, growth and life of your olive tree from your home with just a single seed!
How to grow an olive tree indoors?
We reveal the device and it will be divided into 3 key phases. Yes, it is worth it.
First, extract the pit from the olive, then plant it and then transplant the olive tree outside. Each phase hides tricks … Before starting the process, you must decide on the type of tree you want to plant. Olive trees are not the same, this even applies to the color and aroma of their olives. This difference depends on the type of plant, its cultivation and the ripening time of the fruit.
We therefore advise you to document yourself on the type of olive tree that could grow and especially perpetuate, according to your conditions, your land and your climate.
How to use olive pits?
Now that the choice of the olive tree has been reasonably made, let’s see how you are going to collect the olive pits.
- At the beginning of autumn, collect olives:
This involves picking olives directly from a source olive tree so that the pits are always alive. The season is important because on the one hand, it is the time of green and ripe fruits and on the other, because the olive tree thrives in a hardiness zone ranging from 8 to 10.
Beware of commercial olives whose seed germs have been destroyed by chemical additions. We recommend a few trips to neighboring farms, you will have a great chance of coming across organic ones!
- Soak the olives in a bucket filled with warm water:
This is a way to soften them so that you can easily detach the skin from the seed, the olives are malleable after about a night, soaked in water. Don’t forget to stir the water every three hours. Bad olives may float on the surface and this will be a sign that they are rotten and therefore banned from the process. - Drain the olives and collect the seeds:
Now soft, the olives are easily moldable. Using a hammer or a sharp knife, crush them to separate them from their pits. Using a scrubbing sponge, a knife that you are comfortable with or sandpaper, clean the pits from the olive flesh to get them all clean. - Cut the olive pits but not all the way through:
On the flat end of the pit, insert a knife from the filing side but be careful not to go all the way through so as not to crush the germ of the pit. Then soak them in water at room temperature and wait overnight. The next day, they are ready to move on to the next phase.
How to germinate olive seeds?
Clean and ready to move on to the sowing phase, the olive pits will now be sown in a mixture of soil and potting soil which will in turn drain the water into the soil.
Don’t worry, you can find all this in gardening stores. This adventure is fun from start to finish…
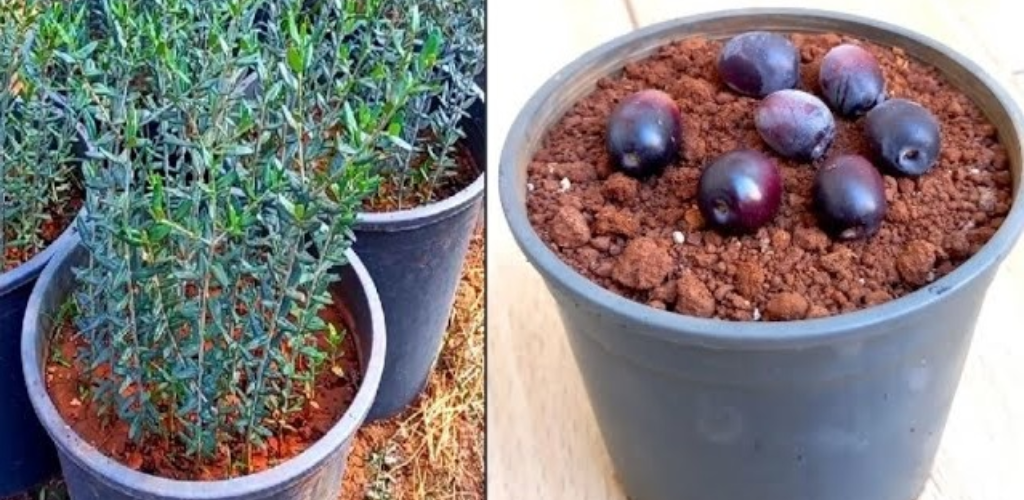
- Plant one olive stone per pot filled with soil and compost:
For each pot of about 7 cm, put a stone coated with soil and compost, remembering to water it but without flooding it either. Wear gloves if you want to mix the compost with your hands, a stick will do the trick too.
- Push the stone but don’t forget to expose the pot to the sun:
Bury the stones up to 3/4 of the pot: the sun helps them to germinate. It is preferable to plant one stone per pot, so it will feed sufficiently on the organic components and nutrients that you have added to it. - Greenhouse effect:
For a greenhouse effect necessary for germination, enclose the pots in polyethylene plastic bags. Proximity to sunlight is beneficial but do not expose them directly from the start. You will observe the growth of the sprouts after a month. It is already starting to take shape, it is cool! - Water is mandatory:
Water is mandatory especially since the 5 centimeters of the soil must remain moist. So stay alert about watering every time half a centimeter dries out. Your finger will be your indicator. This whole experience is based on testing and listening to the plant. Be careful of bacteria that proliferate following excessive watering. - Growth of sprouts